Do you face problems with checking the oil of Honda Pioneer 1000? Don’t worry because here we will tell you how to check the oil on Honda Pioneer 1000. After that we also provide the step-by-step guide of changing the oil of your UTV.
How to Check Oil on Honda Pioneer 1000
Regular maintenance is essential to keep your Honda Pioneer 1000 running smoothly and efficiently. One important aspect of maintenance is checking the oil levels regularly. Here we will explore the step-by-step process of checking the oil on your Honda Pioneer 1000. Also explore the top speed of Honda Pioneer 1000.
Step 1: Park on a Level Surface
Before you begin, make sure to park your Honda Pioneer 1000 on a level surface. This will ensure accurate oil level readings.
Step 2: Let the Engine Cool Down
Allow the engine to cool down for a few minutes before checking the oil. This will prevent any potential burns and ensure an accurate reading.
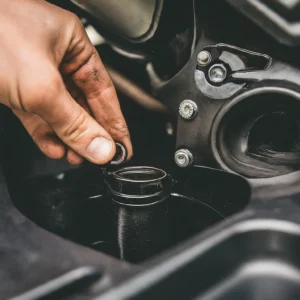
Step 3: Locate the Oil Dipstick
Next, locate the oil dipstick on your Honda Pioneer 1000. The dipstick is usually located on the side of the engine, near the oil filler cap. It’s a long, skinny metal stick with a handle at one end.
Step 4: Remove and Wipe the Dipstick
Remove the dipstick from the engine and wipe it clean with a cloth or paper towel. This will remove any old oil or debris that may interfere with an accurate reading.
Step 5: Reinsert the Dipstick
Reinsert the dipstick back into the engine, making sure it is fully inserted. Next, take it out again to see how much oil there is.
Step 6: Check the Oil Level
Look at the end of the dipstick that was submerged in the oil. There are usually two marks or indicators on the dipstick: a “Full” mark and an “Add” mark. The oil should be between these two marks.
If it’s below the “Add” mark, you’ll need to pour in more oil. If the oil level is above the “Full” mark, you may have too much oil in the engine, and it should be drained to the correct level.
Step 7: Add or Drain Oil (if necessary)
If the oil is lower than the “Add” mark, you’ll need to pour in more oil to fill it up. To do this, remove the oil filler cap and pour the recommended type and amount of oil into the engine. Be careful not to overfill.
If the oil is higher than the “Full” mark, you’ll need to remove the extra oil. This can be done by removing the drain plug located on the bottom of the engine and allowing the excess oil to drain into a suitable container. Once the oil level is at the correct level, replace the drain plug.
Step 8: Recheck the Oil Level
After adding or draining oil, reinsert the dipstick and check the oil level again. It should now be within the recommended range.
Step 9: Replace the Dipstick and Close the Oil Filler Cap
Once you are satisfied with the oil level, replace the dipstick back into the engine and ensure it is securely in place. Then, close the oil filler cap tightly to prevent any leaks.
Step 10: Clean Up
Lastly, clean up any spills or drips that may have occurred during the oil checking process. This will help keep your Honda Pioneer 1000 clean and prevent any potential hazards. Continue your journey by reading the problems of Honda Pioneer 1000.
How to Change Oil on Honda Pioneer 1000
Regular oil changes are an essential part of maintaining the performance and longevity of your Honda Pioneer 1000. By following a few simple steps, you can easily change the oil in your vehicle and keep it running smoothly. Here we will provide you with accurate information and step-by-step instructions to ensure a successful oil change. Also explore the top speed of Honda Pioneer 700.
1. Gather the Necessary Supplies
Before you begin the oil change process, it is important to gather all the necessary supplies. Here’s what you’ll need:
- Oil filter
- Engine oil (check your owner’s manual for the recommended type and quantity)
- Oil drain pan
- Socket wrench or oil filter wrench
- Funnel
- Clean cloth or rag
2. Prepare Your Vehicle
Start by ensuring that your Honda Pioneer 1000 is parked on a level surface. This will help ensure that the oil drains properly and that you get an accurate oil level reading when you’re done. It’s also a good idea to let the engine cool down before beginning the oil change process.
3. Drain the Oil
Find the oil drain plug under your car. Put the oil drain pan below it to catch the old oil. Use a socket wrench to loosen and take out the drain plug. Allow the oil to fully drain into the pan.
While the oil is draining, it’s a good time to inspect the drain plug for any signs of damage or wear. If you notice any issues, it may be a good idea to replace the drain plug before continuing with the oil change.
4. Replace the Oil Filter
Once the oil has finished draining, locate the oil filter on your Honda Pioneer 1000. Using an oil filter wrench, loosen and remove the old oil filter. Be prepared for some oil to spill out when you remove the filter, so make sure the drain pan is still underneath.
Before putting in the new oil filter, put a bit of oil on the rubber ring at the top of the filter. This will help ensure a proper seal. Screw the new oil filter onto the engine by hand, making sure not to over tighten it.
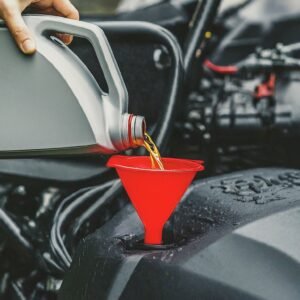
5. Refill with Fresh Oil
Now that the old oil has been drained and the new filter has been installed, it’s time to refill your Honda Pioneer 1000 with fresh oil. Use a funnel to pour the recommended amount of oil into the engine. Check your owner’s manual for the specific oil capacity for your vehicle.
After adding the oil, replace the oil fill cap securely. Start the engine and let it run for a few minutes to allow the fresh oil to circulate throughout the engine. Turn off the engine and check the oil level using the dipstick. If the oil level is too low, you can add more oil until it’s at the correct level.
6. Dispose of the Old Oil Properly
Once you have completed the oil change, it’s important to dispose of the old oil properly. Many auto parts stores and recycling centers accept used motor oil for recycling. Never pour used oil down the drain or into the ground, as it can be harmful to the environment.
Explore the Top speed of Honda Pioneer 500
Honda Pioneer 1000 Oil Capacity
The Honda Pioneer 1000 has an oil capacity of approximately 2.26 quarts (2.14 liters) when the oil filter is also changed. It is important to refer to your owner’s manual or consult with a Honda dealer to confirm the exact oil capacity for your specific model and year.
Honda Pioneer 1000 Oil Change Interval
The recommended oil change interval for the Honda Pioneer 1000 is every 100 hours of operation or every 6 months, whichever comes first. However, it is important to note that the oil change interval may vary depending on factors such as operating conditions, usage, and maintenance practices. Regularly checking the oil level and condition is essential to ensure optimal performance and longevity of your vehicle.
Honda Pioneer 1000 Oil Change Kit
When it comes to performing an oil change on your Honda Pioneer 1000, it is recommended to use a genuine Honda oil change kit. These kits typically include the necessary amount of oil, an oil filter, and a drain plug washer. Using a Honda oil change kit ensures that you are using high-quality products specifically designed for your vehicle, which can help maintain its performance and reliability.
Also read Are Honda Pioneers Street Legal?
How Do You Read an Oil Dipstick?
Reading the oil dipstick is a simple process that allows you to check the oil level in your Honda Pioneer 1000. Here’s how you can do it:
- Park your car in a flat area and make sure the engine is turned off.
- Locate the oil dipstick, which is usually located near the engine and has a yellow or orange handle for easy identification.
- Remove the dipstick and wipe it clean with a cloth or paper towel.
- Reinsert the dipstick fully into its tube.
- Remove the dipstick again and observe the oil level. The stick you use to check the oil usually has lines showing the lowest and highest levels. The oil should be between these lines ideally.
- If the oil level is below the minimum mark, it indicates that the oil is low and needs to be topped up. If the oil level is above the maximum mark, it may indicate overfilling, which can have negative effects on engine performance.
What If the Oil Is Low on the Dipstick?
If the oil level on the dipstick is below the minimum mark, it is important to add the appropriate amount of oil to bring it within the recommended range. Here’s what you can do:
- Make sure that the engine is off and the vehicle is parked on a level surface.
- Locate the oil filler cap, which is usually labeled “Oil” or has an oil can symbol.
- Remove the oil filler cap and add the recommended type and amount of oil. Refer to your owner’s manual or consult with a Honda dealer to determine the correct oil specification and quantity for your vehicle.
- Use a funnel if necessary to avoid spillage and ensure that the oil is poured slowly and carefully.
- After adding the oil, wait for a few minutes to allow it to settle, and then recheck the oil level using the dipstick.
- Keep doing the same thing until the oil level is where it’s supposed to be.
- Be careful not to overfill the oil, as it can lead to engine damage and affect the overall performance of your Honda Pioneer 1000.
Conclusion
Maintaining the oil in your Honda Pioneer 1000 is essential for keeping your engine running smoothly and efficiently. By regularly checking the oil level and changing the oil at recommended intervals, you can make sure the longevity and performance of your vehicle. Following the steps outlined in this guide, supported by accurate information and facts, will help you maintain your Honda Pioneer 1000 and enjoy many adventures on and off the road.