If you own a Honda Pioneer 500, you may find yourself in need of locating the battery at some point. The battery is a crucial component of any vehicle, and knowing its exact location can be helpful for maintenance and troubleshooting purposes. In this article, we will provide you the information on where to find the battery on a Honda Pioneer 500.
Where is the battery on the Honda Pioneer 500
Here is the step-by-step guide on how to find the battery location of the Pioneer 500. You will continue your journey by exploring the top speed of the Honda Pioneer 500.
Step 1: Gather the Necessary Tools
Before you begin, it’s a good idea to gather the necessary tools to make the process easier. You will need a socket wrench or a set of pliers, as well as a clean cloth or rag to wipe away any dirt or debris.
Step 2: Open the Seat
To access the battery on a Honda Pioneer 500, you will first need to open the seat. Locate the latch or release mechanism on the seat and unlatch it. Lift the seat upwards to reveal the storage compartment beneath.
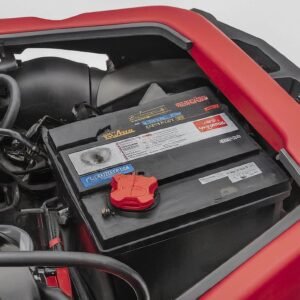
Step 3: Locate the Battery
With the seat open, you will now be able to locate the battery. On a Honda Pioneer 500, the battery is typically located towards the rear of the vehicle, underneath the seat. Look for a rectangular or square-shaped box with cables connected to it.
Step 4: Disconnect the Battery
Before performing any maintenance or troubleshooting tasks, it’s important to disconnect the battery to avoid any electrical hazards. Using a socket wrench or a set of pliers, carefully loosen and remove the negative (-) terminal connector first, followed by the positive (+) terminal connector. Set the connectors aside in a safe place.
Step 5: Perform Maintenance or Troubleshooting
With the battery disconnected, you can now perform any necessary maintenance or troubleshooting tasks. This may include cleaning the battery terminals, checking the battery voltage, or replacing the battery if needed. Refer to your Honda Pioneer 500 owner’s manual for specific instructions on these tasks.
Step 6: Reconnect the Battery
Once you have completed the maintenance or troubleshooting tasks, it’s time to reconnect the battery. Start by attaching the positive (+) terminal connector to the battery and tighten it securely. Then, attach the negative (-) terminal connector and tighten it as well.
Step 7: Close the Seat
With the battery reconnected, you can now close the seat. Lower the seat back down and make sure it latches securely. Give it a gentle tug to ensure it is properly locked in place.
How to Jumpstart a Honda Pioneer 500

If you find yourself in a situation where your Honda Pioneer 500 won’t start, a dead battery may be the culprit. Jumpstarting your Honda Pioneer 500 is a simple process that can get you back on the road quickly. Here’s a step-by-step guide on how to jumpstart your Honda Pioneer 500. Also, explore the most common problems of the Honda Pioneer 500 with their easy solutions.
Step 1: Gather the Necessary Tools
Make sure you have the following tools and equipment before you begin:
- A set of jumper cables
- A vehicle with a working battery
- Protective gloves and goggles (optional but recommended)
Step 2: Position the Vehicles
Park the vehicle with the working battery next to your Honda Pioneer 500. Make sure both vehicles are in park or neutral and turn off the ignition in both vehicles. Adding safety is also possible by engaging the parking brake.
Step 3: Connect the Jumper Cables
Locate the battery terminals on both vehicles by opening the hoods. The positive terminal is usually marked with a “+” symbol, while the negative terminal is marked with a “-” symbol. Connect the jumper cables in the following order:
- Connect one end of the red (positive) jumper cable to the positive terminal of the dead battery on your Honda Pioneer 500.
- The other end of the red (positive) jumper cable should be connected to the positive terminal of the battery that is working.
- The black (negative) jumper cable should be connected to the negative terminal of the working battery.
- Connect the other end of the black (negative) jumper cable to a metal surface on your Honda Pioneer 500, away from the battery.
Step 4: Start the Vehicles
Once the jumper cables are securely connected, start the vehicle with the working battery and let it run for a few minutes. This will allow the battery to charge. After a few minutes, try starting your Honda Pioneer 500. If it starts, remove the jumper cables in the reverse order that you connected them:
- Disconnect the black (negative) jumper cable from the metal surface of your Honda Pioneer 500.
- Disconnect the black (negative) jumper cable from the negative terminal of the working battery.
- Disconnect the red (positive) jumper cable from the positive terminal of the working battery.
- Disconnect the red (positive) jumper cable from the positive terminal of the dead battery on your Honda Pioneer 500.
Step 5: Let the Engine Run
Once your Honda Pioneer 500 is running, let the engine run for a few minutes to allow the battery to charge further. This will help ensure that your Honda Pioneer 500 doesn’t stall again when you turn it off.
Also explore Are Honda Pioneers Street Legal in the US?
Where is the VIN Number on a Honda Pioneer 500?
The VIN (Vehicle Identification Number) on a Honda Pioneer 500 can be found in a few different locations:
- On the frame: Look for a metal plate or sticker on the frame of the vehicle, usually near the front. The VIN will be a series of letters and numbers.
- On the engine: The VIN may also be stamped or engraved on the engine of the Honda Pioneer 500. Check around the engine block or on the engine casing.
- On the registration documents: If you have the registration documents for the vehicle, the VIN should be listed there as well.
It’s important to double-check the VIN number to ensure it matches the registration documents and any other paperwork related to the Honda Pioneer 500.
Conclusion
Knowing the exact location of the battery on your Honda Pioneer 500 is essential for maintenance and troubleshooting purposes. By following the step-by-step guide outlined in this article, you can easily locate the battery and perform any necessary tasks.
For specific instructions and safety precautions, always refer to your owner’s manual. If you are unsure or uncomfortable with any aspect of working with the battery, it is recommended to seek professional assistance.