Are you facing problems with the Honda Pioneer 1000? You are not alone because most owners also face issues with this.
The most common Honda Pioneer 1000 problems are transmission problems, engine air take, engine light issues, engine stalling issues, excessive cabin heat, scalding steam rising up through the seat, harsh ride issues and PTO problems.
We discuss these issues in detail with their easy solutions so that a non-technical person can solve them by reading our guide.
8 Major Honda Pioneer 1000 Problems
Now we are going to discuss the major problems of the Honda Pioneer 1000 with their easy solutions and these are the same as Honda Pioneer 700 issues.
1. Transmission Problems
Here are some common transmission problems with the Honda Pioneer 1000 that its owners may face. Continue your journey by exploring the top speed of Honda Pioneer 1000.
1. Shifting Issues
One of the most common transmission problems in the Honda Pioneer 1000 is shifting issues. You may experience difficulty in shifting gears, such as gears not engaging properly or grinding noises when shifting. Various factors, including worn-out clutch plates, a faulty shift fork, or a damaged shift drum can cause this.
To resolve shifting issues, you can start by checking the clutch plates for wear and replacing them if necessary. If the clutch plates are in good condition, you may need to inspect the shift fork and shift drum for any damage or misalignment. If you are not comfortable performing these inspections and repairs yourself, it is recommended to take your Honda Pioneer 1000 to a certified mechanic.
2. Transmission Slipping
Another common transmission problem is transmission slipping. You may notice that your Honda Pioneer 1000’s transmission slips out of gear or experiences a loss of power while driving. This can be caused by a worn-out clutch, low transmission fluid level, or a faulty shift solenoid.
To address transmission slipping, you can start by checking the transmission fluid level and topping it up if it is low. If the fluid level is fine, you may need to inspect the clutch for wear and replace it if necessary.
Additionally, a faulty shift solenoid can also cause transmission to slip, and it may need to be replaced by a professional mechanic.
Read about the best off-road vehicles
3. Overheating
Overheating is another transmission problem that some Honda Pioneer 1000 owners may encounter. Continuous heavy use or towing heavy loads can cause the transmission to overheat, leading to poor performance and potential damage to the transmission components.
To prevent transmission overheating, it is essential to ensure that your Honda Pioneer 1000 is adequately cooled. Regularly check the cooling system for any leaks or blockages and clean the radiator fins to maintain proper airflow.
Additionally, avoid excessive towing or pushing the vehicle beyond its recommended limits to prevent overheating.
Some Other Transmission Issues
- Transmission Fluid Leaks: Transmission fluid leaks can lead to low fluid levels, which can cause overheating and premature wear of transmission components. Inspect the transmission and surrounding areas for any signs of fluid leaks, such as puddles or stains on the ground or transmission housing. If you identify a leak, locate and repair the source of the leak, whether it’s a damaged seal, gasket, or transmission line. Be sure to replenish the transmission fluid to the appropriate level after addressing the leak.
- Strange Noises or Vibrations: Unusual noises or vibrations coming from the transmission, such as whining, humming, or rattling sounds, can indicate various issues, including worn bearings, damaged gears, or improper gear engagement. Perform a visual and auditory inspection of the transmission while the vehicle is running to identify any abnormal sounds or vibrations. If necessary, consult a professional mechanic for a thorough diagnosis and repair of the underlying cause.
- Delayed Engagement or Sluggish Response: Delayed engagement or a sluggish response when accelerating or shifting gears can be caused by several factors, including low transmission fluid levels, a worn clutch, or internal transmission damage. Check the transmission fluid level and quality, and refill or replace it as needed. Additionally, inspect the clutch system for wear and adjust or replace any worn components. If the issue persists, have the transmission inspected by a qualified mechanic for further diagnosis and repair.
2. Engine air intake
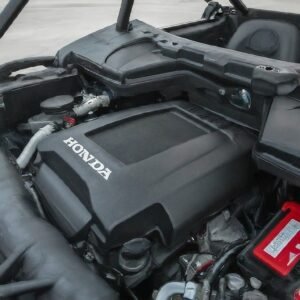
Here a some common engine air intake problems that Honda Pioneer 1000 owners may encounter. Also explore the issues of Pioneer 520.
1. Clogged Air Filter
A clogged air filter is one of the most common air intake problems in any vehicle, including the Honda Pioneer 1000. Over time, dirt, dust, and debris can accumulate in the air filter, restricting the airflow to the engine. This might make the engine work less effectively, use up more fuel, and could even harm the engine.
The solution to this problem is relatively simple. Regularly inspect the air filters, if they are dirty clean them, and if needed replace them. Cleaning or replacing the air filter will make sure that the engine receives a sufficient amount of clean air for optimal performance.
2. Water in the Air Intake
Another common problem with the Honda Pioneer 1000 engine air intake is water infiltration. If you frequently ride through water or encounter heavy rain, there is a possibility that water may enter the air intake system. This can cause engine misfires, rough idling, and even hydrolock, which can result in severe engine damage.
To prevent water from entering the air intake, it is essential to install an air intake snorkel kit. An air intake snorkel kit raises the air intake above the water level, allowing the vehicle to safely traverse through water without the risk of water entering the engine. Additionally, it is crucial to avoid driving through deep water or flooded areas whenever possible.
3. Dust and Debris in the Air Intake
Off-roading often involves driving through dusty and dirty terrains, which can lead to the accumulation of dust and debris in the air intake system. This can result in reduced engine performance and increased wear and tear on engine components.
To prevent dust and debris from entering the air intake, it is recommended to install a pre-filter or a dust cover. A pre-filter is an additional layer of protection that traps larger particles before they reach the air filter. This helps prolong the life of the air filter and ensures that the engine receives clean air.
Some other issues
- Air Filter Housing Damage: The air filter housing protects the air filter from debris and contaminants. If the housing is damaged or improperly sealed, it can allow dirt and debris to enter the engine, causing damage and affecting performance. Inspect the air filter housing for any signs of damage and repair or replace it as necessary.
- Air Intake Hose Leaks: The air intake hose connects the air filter housing to the engine intake manifold. If the hose develops cracks or leaks, it can allow unmetered air to enter the engine, leading to rough idling, stalling, and reduced power. Inspect the air intake hose for any signs of damage and replace it if necessary to restore proper engine operation.
- Faulty Mass Airflow Sensor (MAF): The MAF sensor measures the amount of air entering the engine and sends this information to the engine control unit (ECU) to adjust fuel delivery accordingly. A faulty MAF sensor can result in an incorrect air/fuel mixture, leading to engine hesitation, poor acceleration, and increased fuel consumption. If you suspect a faulty MAF sensor, have it tested and replaced if necessary by a qualified technician.
- Restricted Air Intake: Sometimes, the air intake itself can become blocked or restricted, preventing sufficient airflow to the engine. Check for any obstructions or debris in the air intake ducts and remove them to restore proper airflow.
- Dirty Throttle Body: The throttle body manages how much air goes into the engine. If it becomes dirty or clogged with carbon deposits, it can affect airflow and engine performance. Clean the throttle body periodically using throttle body cleaner to remove any buildup and restore proper operation.
Also explore that How to Check & Change Oil on Honda Pioneer 1000.
3. Engine light Issues

There are several reasons why the engine light might come on in your Honda Pioneer 1000. The most common causes include:
- Oxygen Sensor Malfunction: This sensor monitors the amount of unburned oxygen in your exhaust system.A broken sensor can harm engine performance and reduce fuel efficiency.
- Loose or Damaged Gas Cap: A loose or damaged gas cap can cause fuel vapors to leak, prompting the engine light to activate.
- Catalytic Converter Issues: Problems with the catalytic converter can lead to increased emissions and reduced performance, triggering the engine light.
Solutions
If your Honda Pioneer 1000’s engine light comes on, here are the steps to take:
- Check the Gas Cap: Ensure that your gas cap is secure and in good condition.
This easy step can often fix the problem. - Use an OBD-II Scanner: An on-board diagnostic (OBD-II) scanner can read the error codes causing the engine light. This tool provides specific codes that can help identify the problem.
- Consult a Professional: If the issue persists, it might be best to consult a professional mechanic who has experience with Honda Pioneer vehicles. They can offer a thorough diagnosis and repair.
4. Engine Stalling Issues

Engine stalling in the Honda Pioneer 1000 can be attributed to several factors. One of the most common causes is a clogged or dirty air filter. A clogged air filter restricts airflow to the engine, causing it to struggle and eventually stall.
Additionally, issues like faulty spark plugs, fuel system problems, or even a malfunctioning ignition switch can lead to stalling. It’s essential to regularly maintain your vehicle to prevent these issues from arising. Also explore the issues of Honda Pioneer 500.
Diagnostic Steps to Identify the Issue
To diagnose the cause of the engine stalling, follow these steps:
- Check the air filter: Ensure it’s clean and free from debris. Replace it if necessary.
- Inspect the spark plugs: Look for signs of wear or damage. If they look corroded or damaged, replace them.
- Examine the fuel system: Ensure there are no leaks or blockages in the fuel lines. Check the fuel pump and filter as well.
- Test the ignition switch: Ensure it’s functioning correctly and making proper contact when turned.
5. Excessive cabin heat

Excessive cabin heat in the Honda Pioneer 1000 can occur for several reasons. The primary cause is usually the engine’s heat dissipating into the cabin area.
The mid-mounted engine design, while excellent for stability and performance, can contribute to the heat buildup, especially during prolonged use. This problem may be exacerbated in warmer climates or when the vehicle is used for heavy-duty tasks.
Solutions
Thankfully, you can take practical steps to mitigate excessive cabin heat. Here are some of the most effective ways:
- Install a Heat Shield: Many users have found that adding a heat shield or insulation materials can significantly reduce the amount of heat entering the cabin.
- Improve Ventilation: Increasing airflow through the cabin can help dissipate heat more effectively. This can be achieved by installing additional fans or vents.
- Regular Maintenance: Ensuring your vehicle is well-maintained can help minimize heat-related issues. Regularly check and clean your cooling system, and replace any worn-out parts promptly.
6. Scalding steam Rising up through the seat
If you own a Honda Pioneer 1000, you may have experienced the unsettling problem of scalding steam rising up through the seat. This issue can be both uncomfortable and potentially dangerous, so it’s important to address it promptly.
Several factors can contribute to scalding steam rising up through the seat of your Honda Pioneer 1000.
1. Faulty Radiator Cap
A faulty radiator cap can cause excessive pressure to build up in the cooling system, leading to steam escaping through the seat. If the cap is not sealing properly or is damaged, it may need to be replaced.
2. Coolant Leak
A coolant leak can result in low coolant levels, which can cause the engine to overheat. When the engine overheats, steam can escape through various openings, including the seat. Inspect your vehicle for any signs of coolant leaks and repair them as soon as possible.
3. Blocked Radiator or Cooling System
If the radiator or cooling system is blocked or clogged, it can restrict the flow of coolant and cause the engine to overheat. This can result in steam escaping through the seat. Regular maintenance and cleaning of the radiator and cooling system can help prevent this issue.
Solutions to Fix the Scalding Steam Issue
Now that we’ve identified some possible causes, let’s explore the solutions to fix the scalding steam issue in your Honda Pioneer 1000:
- Replace the Radiator Cap: If you suspect that a faulty radiator cap is the culprit, it’s recommended to replace it with a new one. Make sure to choose a cap that is compatible with your vehicle’s cooling system and follow the manufacturer’s instructions for installation.
- Repair Coolant Leaks: If you find any coolant leaks, it’s crucial to repair them promptly. Depending on the severity of the leak, you may be able to fix it yourself or seek assistance from a professional mechanic. Remember to use the recommended coolant for your Honda Pioneer 1000.
- Clean the Radiator and Cooling System: Regularly cleaning the radiator and cooling system can help prevent blockages and ensure optimal performance. Follow the manufacturer’s guidelines on how to properly clean these components or consult a professional if you’re unsure.
7. Harsh ride Issues

Here are some issues of the harsh ride with your UTV.
Suspension System
The suspension system of the Honda Pioneer 1000 plays a crucial role in providing a smooth and comfortable ride. If you are experiencing a harsh ride, it is possible that there may be an issue with your suspension system. Some common problems include worn-out shocks, damaged springs, or misaligned suspension components.
Solution: The first step in resolving suspension-related issues is to inspect the system thoroughly. Check for any signs of damage or wear on the shocks, springs, and other suspension components. If you notice any issues, it is recommended to replace the damaged parts with genuine Honda replacements. Additionally, consider upgrading to aftermarket suspension components that are specifically designed to improve ride quality.
Tire Pressure
Another factor that can contribute to a harsh ride is incorrect tire pressure. If the tire pressure is too high or too low, it can affect the overall ride quality and make the vehicle feel bumpy and uncomfortable.
Solution: Check the tire pressure regularly and ensure that it is within the manufacturer’s recommended range. You can find the recommended tire pressure in the owner’s manual or on a sticker located on the vehicle. Use a reliable tire pressure gauge to measure the pressure accurately and adjust it as needed. Maintaining the correct tire pressure will not only improve the ride quality but also enhance the overall performance and fuel efficiency of your Honda Pioneer 1000.
Terrain and Driving Conditions
The harshness of the ride can also be influenced by the type of terrain and driving conditions you encounter. Rough or uneven surfaces, such as rocky trails or unpaved roads, can make the ride feel more jarring and uncomfortable.
Solution: While it may not be possible to control the terrain or driving conditions entirely, there are steps you can take to minimize the impact on your ride quality. Consider adjusting your driving style by slowing down and avoiding sudden movements or impacts. Additionally, investing in accessories like skid plates and protective guards can help protect the undercarriage of your vehicle and reduce the impact of rough terrain.
8. PTO Issues
Here are some PTO problems with the Honda Pioneer 1000.
PTO Engagement Issues:
- Problem: Difficulty engaging the PTO can be frustrating. This issue often stems from misalignment or wear in the engagement mechanism.
- Solution: Regularly inspect and adjust the PTO linkage. Ensure all components are correctly aligned and lubricated. Replacing worn parts can restore smooth operation.
PTO Clutch Slippage:
- Problem: Slippage in the PTO clutch can reduce power transfer efficiency, affecting performance.
- Solution: Inspect the clutch for wear and tear. Replace worn clutch plates and ensure proper tension in the drive belt. Regular maintenance can prevent slippage.
PTO Shaft Vibration:
- Problem: Excessive vibration in the PTO shaft can lead to noise and wear.
- Solution: Check for any bent or misaligned parts in the PTO shaft. Balance and realign the shaft as necessary. Regular inspections can find problems before they get worse.
PTO Overheating:
- Problem: Overheating of the PTO system can cause damage and reduce lifespan.
- Solution: Ensure proper lubrication and cooling. Regularly clean and inspect cooling fins and vents. Use high-quality fluids to maintain optimal temperature.
Conclusion
As you see here we discuss the major Honda Pioneer 1000 problems with their easy solutions. Now whenever you encounter any of these issues you can solve them easily by reading our guide.
I hope you again come to this website to learn about the problems of the other model of UTV like Coleman UTV issues and many others.