The most common Cub Cadet LTX 1045 problems are transmission issues, belt problems, fail to start, deck problems, electrical problems, PTO problems and brake issues.
Here we explore these issues in detail along with their easy solutions.
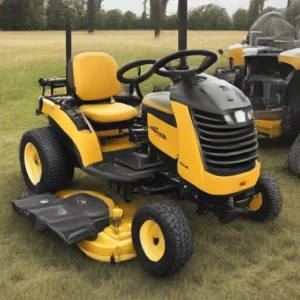
Cub Cadet LTX 1045 problems and solutions
Now we are going to explore the 9 most common problems of Cub Cadet LTX 1045 with their easy solutions. Also explore the problems of Cub Cadet LTX 104o.
1. Transmission Problems
The Cub Cadet LTX 1045 lawn tractor is a robust and reliable machine, but like any mechanical device, it is prone to certain transmission problems.
One of the most frequently encountered issues is transmission slipping, which can be identified by a noticeable lack of power or abrupt changes in speed.
Symptoms of transmission slipping include unusual noises, such as grinding or whining, and difficulty in shifting gears. These symptoms can be alarming, but understanding them is the first step towards finding a solution.
Another critical issue that owners of the Cub Cadet LTX 1045 might face is hydrostatic transmission failure.
This problem can manifest in various ways, such as the tractor not moving at all or moving very slowly regardless of throttle input.
Hydrostatic transmission relies on hydraulic fluid to function correctly, and any disruption in this system can lead to significant performance issues.
Common causes of hydrostatic transmission failure include low hydraulic fluid levels, which can be due to leaks or inadequate maintenance. Worn-out belts are another frequent culprit, as they can lose tension and fail to transfer power effectively.
Additionally, clogged filters can restrict the flow of hydraulic fluid, leading to poor transmission performance. Regular maintenance and timely replacement of these components are essential to prevent such issues.
To provide a broader perspective, it’s important to note that the average lifespan of a transmission in a lawn tractor like the Cub Cadet LTX 1045 is typically around 500 to 1,500 hours of operation.
However, premature transmission failure is often due to neglect in maintenance practices, such as infrequent changing of hydraulic fluid and filters.
By adhering to a regular maintenance schedule and being vigilant about the symptoms of transmission problems, owners can significantly extend the life of their tractor’s transmission.
Effective Solutions
One of the first steps is to regularly check and maintain the hydraulic fluid levels. It is crucial to use the manufacturer-recommended hydraulic fluid for optimal performance.
Start by locating the hydraulic fluid reservoir, usually found near the transmission. Ensure the fluid level is within the recommended range, and top it off if necessary. Regularly replacing the hydraulic fluid as per the manual’s schedule can prevent many transmission issues.
Next, inspect the belts for any signs of wear and tear. Worn-out belts can severely affect the transmission’s efficiency. To replace a damaged belt, disengage the mower deck and remove the belt guard.
Carefully slide off the worn belt and install a new one, ensuring it is properly aligned and tensioned. Cleaning or replacing clogged filters is another critical step; clogged filters can restrict fluid flow, leading to transmission problems. Locate the filter housing, remove the old filter, and install a new one, ensuring it fits snugly.
If a transmission flush is necessary, follow these steps: first, safely elevate the lawn tractor to access the transmission. Drain the old fluid completely, then flush the system with a suitable cleaning agent recommended by the manufacturer.
Refill with fresh hydraulic fluid, ensuring no air pockets are trapped in the system. This process helps remove any debris or contaminants that may be affecting the transmission’s functionality.
Also read: Cub Cadet XT1 LT46 problems
2. Cub Cadet LTX 1045 Steering Issues
One of the most frequent issues is difficulty in turning the steering wheel. This problem may manifest as a stiff or unresponsive steering wheel that requires excessive force to maneuver, which can be particularly frustrating during prolonged usage.
Another common symptom is steering wheel play, which refers to a noticeable looseness or wobble when attempting to steer. This can make it challenging to maintain a straight path, leading to uneven mowing patterns and potentially unsafe operation.
Uneven steering, where the tractor veers more easily in one direction than the other, is another issue that users frequently report. This inconsistency can result in an uneven cut and increased operator fatigue.
Several factors can contribute to these steering problems. Worn or damaged steering components are a primary cause; for instance, wear and tear on the steering gear sector or drag link can significantly impact steering responsiveness.
Misalignment of the steering assembly is another potential culprit, often resulting from regular use or minor collisions. Inadequate lubrication of steering parts can also lead to increased friction, making it harder to turn the steering wheel smoothly.
Effective Solutions
First, it’s essential to identify and replace faulty steering components. Begin by inspecting the tie rods for any signs of wear or damage. Worn tie rods can lead to steering instability, so replacing them with new, high-quality parts is crucial.
Next, examine the bushings. These small but vital components can deteriorate over time, causing increased steering play. If you find any worn or damaged bushings, replace them to ensure smoother steering operation.
Additionally, the steering sector gear should be inspected for any signs of wear. A worn sector gear can lead to difficulties in steering and should be replaced promptly to maintain optimal control.
Regular maintenance is paramount in preventing steering problems. Lubricating the steering parts is essential to ensure they move smoothly. Use a high-quality grease on the steering shaft, sector gear, and other moving parts. Periodic alignment checks are also critical.
Misalignment can cause uneven wear and make steering more challenging. Adjust the alignment as needed to keep your lawn tractor steering accurately.
For these repairs, you will need specific tools and materials, including a wrench set, grease gun, replacement parts like tie rods, bushings, and sector gears, and alignment tools. Safety should always be a priority during repairs. Ensure the lawn tractor is on a stable, flat surface and engage the parking brake. Wearing safety gloves and eye protection can prevent injuries from sharp components and debris.
3. Cub Cadet LTX 1045 Belt Problems
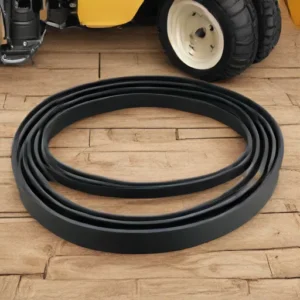
A frequent problem is belt slipping, which typically manifests as a sudden loss of power to the cutting blades or drive system. This issue is often caused by improper belt tension or misalignment, leading to uneven cutting and inefficient operation.
Another common issue is belt fraying, characterized by visible wear and tear on the belt edges. Fraying can result from worn pulleys or the presence of debris within the mower deck, which creates friction and accelerates belt deterioration. Regular inspection and cleaning of the mower deck can help mitigate this problem.
Frequent belt breakage is also a typical concern among Cub Cadet LTX 1045 users. This issue is usually indicative of underlying problems such as extreme belt tension, defective pulleys, or the use of incompatible belts. Ensuring that the belt is correctly tensioned and that all pulleys are in good condition can prevent premature belt failure.
These belt issues not only affect the mower’s cutting performance but can also lead to a complete loss of drive power, rendering the lawn tractor inoperable.
Recognizing the symptoms early and understanding their root causes is crucial for maintaining the functionality of your UTV.
Misalignment, improper tension, worn pulleys, and debris buildup are the primary culprits behind these belt problems. By addressing these factors, users can ensure smooth operation and extend the lifespan of their lawn tractor.
Also read: Cub Cadet XT1 problems
Effective Solutions
Addressing belt issues in your Cub Cadet LTX 1045 requires a combination of practical solutions and preventive measures. Correct alignment, proper tension adjustment, and timely replacement of worn or damaged pulleys are crucial steps to ensure smooth operation. Below, we provide a detailed guide to help you tackle these common belt problems effectively.
Step-by-Step Guide to Align the Belt:
Begin by turning off the mower and disconnecting the spark plug to ensure safety. Raise the mower deck to access the belt area. Examine the belt’s position on the pulleys and ensure it sits correctly within the grooves.
If misaligned, carefully reposition the belt, ensuring it follows the correct routing path as outlined in the user manual. This step is essential to prevent slippage and uneven wear.
Adjusting the Belt Tension:
Proper tension is critical for belt longevity and performance. Locate the tension adjustment mechanism, which is typically a spring-loaded bracket or an idler pulley. Using the appropriate tools, adjust the tension to achieve a firm, but not overly tight, fit.
The belt should have a slight give when pressed but should not sag. Refer to the user manual for specific tension settings recommended for the LTX 1045 model.
Replacing Worn or Damaged Pulleys:
Inspect all pulleys for signs of wear, cracks, or damage. Worn pulleys can cause the belt to slip or break. If any pulley shows signs of wear, replace it promptly.
To remove a pulley, loosen the mounting bolts and carefully detach it from the mower. Install the new pulley by aligning it with the belt path and securing it with the mounting bolts.
Regular Maintenance:
Regular maintenance is key to preventing belt problems. Clean the mower deck frequently to remove debris that could interfere with belt operation.
Check the belts often for wear, like fraying or cracking. Replace belts showing significant wear to avoid unexpected breakdowns. Lubricate moving parts as recommended in the user manual to enhance overall performance and longevity.
4. Cub Cadet LTX 1045 Won’t Start

One of the most straightforward causes is a dead or weak battery. To determine if the battery is the issue, begin by checking the battery voltage and connections. Ensure the battery is fully charged by using a multimeter to measure its voltage.
A fully charged battery should show about 12.6 volts. If it’s much lower, think about recharging or replacing the battery.
Additionally, inspect the battery terminals and connections for any signs of corrosion or looseness, as these can impede the flow of electricity.
Another frequent culprit is the fuel system. Old or contaminated fuel can clog the carburetor or fuel lines, leading to starting difficulties. To address this issue, first drain any old fuel from the tank.
Next, clean the carburetor by removing it and using a carburetor cleaner to eliminate any deposits. It’s also advisable to replace the fuel filter regularly to ensure clean fuel reaches the engine. Fresh, clean fuel can significantly improve the starting and overall performance of your Cub Cadet LTX 1045.
The ignition system is another area to inspect. Bad spark plugs or ignition coils can stop the engine from starting. Check the spark plugs for wear or dirt.
If they appear damaged or dirty, replace them with new ones. Similarly, inspect the ignition coils for any visible damage or wear and replace them if necessary. Properly functioning spark plugs and ignition coils are crucial for delivering the spark needed to ignite the fuel-air mixture in the engine.
Lastly, safety switches can interrupt the starting process if not properly engaged. Ensure that all safety switches, including the seat switch, brake switch, and PTO switch, are in the correct position. These switches are designed to prevent the engine from starting under unsafe conditions. A malfunctioning or improperly engaged safety switch can easily be the cause of your starting issues.
By systematically diagnosing each of these potential problems, you can effectively address the issue and get your Cub Cadet LTX 1045 up and running again.
Step-by-Step Solutions
Addressing the starting issues in your Cub Cadet LTX 1045 requires a systematic approach to ensure you cover all potential problem areas. Follow these detailed steps to troubleshoot and resolve the common problems.
Battery Check and Maintenance
First, assess the battery. Begin by testing its voltage using a multimeter. A fully charged battery should show about 12.6 volts.. If the voltage is low, clean the battery terminals using a wire brush to ensure a solid connection.
Should the battery still fail to hold a charge, consider jump-starting the mower using a car battery or a jump starter. Connect the positive terminal to positive and the negative to negative, then try to start the mower. If the battery remains unresponsive, it may need replacement.
Fuel System Inspection
Next, examine the fuel system. If your mower has been sitting for an extended period, old fuel can become a problem. Safely drain the old fuel from the tank and replace it with fresh gasoline. Additionally, check the carburetor for any signs of clogging.
Cleaning the carburetor involves removing it, spraying carburetor cleaner through its jets and passages, or replacing it if the build-up is too extensive. Ensure the fuel lines are clear from obstructions by blowing compressed air through them.
Ignition System Troubleshooting
For ignition-related issues, start by inspecting the spark plug. Remove the spark plug and check its condition. If it appears dirty or worn, clean it with a wire brush or replace it.
Ensure the spark plug gap is set to the manufacturer’s specifications, typically around 0.03 inches for the Cub Cadet LTX 1045. If the spark plug is in good condition but there’s still no spark, test the ignition coil with a multimeter and replace it if it fails the test.
Safety Switches Examination
Finally, safety switches can often be the culprit behind starting issues. Locate the seat switch, brake switch, and blade engagement switch. Test each switch for continuity using a multimeter.
Ensure all safety switches are properly engaged and not bypassed, as they prevent the mower from starting if not correctly positioned. Replace any faulty switches to restore functionality.
5. Cub Cadet LTX 1045 Deck Problems

Users of the Cub Cadet LTX 1045 often encounter several recurring deck problems that can significantly impact the mower’s performance. One prevalent issue is uneven cuts, which can stem from a misaligned deck or dull blades.
When the deck is not properly leveled, the mower may leave patches of varying grass height, leading to an unsightly lawn. Similarly, blades that have not been sharpened recently will tear rather than cleanly cut the grass, resulting in a jagged and uneven appearance.
Regularly checking and adjusting the deck alignment, as well as sharpening the blades, can help mitigate these issues.
Another common problem is deck vibrations, which users frequently report. These vibrations can be caused by several factors, including loose bolts, worn-out bearings, or damaged pulleys. When bolts securing the deck components become loose, they can cause the deck to vibrate excessively during operation.
Likewise, worn bearings or damaged pulleys create imbalances that lead to vibrations. Regularly inspecting and tightening bolts, as well as replacing damaged components, can ensure smoother operation.
Belt wear is also a significant concern for Cub Cadet LTX 1045 owners. The mower’s belt is crucial for transferring power from the engine to the blades. Over time, belts can become worn or frayed, leading to slippage or breakage.
Signs of belt wear include visible cracking, fraying, or a noticeable decrease in cutting performance. Regularly inspecting the belt and replacing it when signs of wear appear can prevent more severe issues and maintain optimal cutting efficiency.
Effective Solutions
To maintain the efficiency and extend the lifespan of your Cub Cadet LTX 1045, addressing deck problems promptly and implementing preventative measures are crucial. Below are detailed solutions for each common deck issue, along with preventative tips to avoid future problems.
One frequent issue is deck misalignment. To properly align the deck, first, park the mower on a flat surface and engage the parking brake. Next, lower the deck to its lowest position and measure the height of the blades from the ground.
Ensure both sides are equal by adjusting the deck suspension links. Tighten all bolts to secure the alignment. Regularly checking and maintaining the alignment can prevent uneven cuts and additional wear on the mower.
Another common problem is loose bolts. Routinely inspect all bolts and screws on the deck and tighten any that are loose. This can be achieved using a torque wrench to ensure the bolts are tightened to the manufacturer’s specifications. Consistent maintenance of bolt integrity prevents unnecessary vibrations and potential damage to the mower.
Worn-out belts can significantly impact the mower’s performance. To replace a worn belt, first, disconnect the spark plug for safety. Remove the deck and take off the old belt, noting its routing path.
Install the new belt by following the same path and ensure it is properly seated in the pulleys. Reattach the deck and reconnect the spark plug. Regularly inspecting the belts for wear and replacing them as needed will keep the mower operating smoothly.
6. Electrical Issues in the Cub Cadet LTX 1045
Owners of the Cub Cadet LTX 1045 often encounter a range of electrical problems. Understanding these issues and their root causes can significantly aid in effective troubleshooting and maintenance. One of the most prevalent problems is battery failure.
This issue can stem from several factors, including the battery’s age, poor maintenance practices, or exposure to extreme temperatures.
Aged batteries tend to lose their capacity to hold a charge, while lack of regular maintenance can lead to the accumulation of dirt and corrosion on the terminals, impeding electrical flow. Extreme temperatures, whether hot or cold, can also adversely affect the battery’s performance and longevity.
Another common issue is related to the starter motor. If the starter motor fails to engage or turn over the engine, it could be due to corroded connections or a faulty solenoid.
Corrosion on the electrical connections can interrupt the flow of electricity, preventing the starter motor from functioning correctly. Similarly, a malfunctioning solenoid, which acts as a switch to engage the starter motor, can cause the engine to fail to start.
Regular inspection and cleaning of the electrical connections, along with checking the solenoid’s functionality, can help mitigate this problem.
Blown fuses are also a frequent concern for Cub Cadet LTX 1045 owners. Fuses protect the electrical system from short circuits and overloads by breaking the circuit when too much current flows through.
When a fuse blows, it indicates an underlying issue such as a short circuit or an overload in the electrical system. Identifying and rectifying the cause of the blown fuse is crucial to prevent recurrent problems. Regularly inspecting the wiring and ensuring that electrical loads are within the system’s capacity can help in maintaining the integrity of the electrical system.
Effective Solutions
Maintaining the electrical system of your Cub Cadet LTX 1045 is essential for its longevity and reliable performance. A well-maintained battery is crucial. Regularly check the battery’s charge using a voltmeter. A fully charged battery should read about 12.6 volts.
If the voltage is below 12.4 volts, consider recharging it. Check the battery terminals for corrosion, which can block the connection. Clean the terminals with a mixture of baking soda and water, and ensure they are securely tightened. If the battery fails to hold a charge even after cleaning and recharging, it might be time to replace it.
Starter motor issues can often be traced back to poor connections or a faulty solenoid. Begin by inspecting all wiring connected to the starter motor for signs of damage or looseness. Clean any dirty or corroded connections with a wire brush.
To test the solenoid, use a multimeter to check for continuity; if there is none, replacing the solenoid is advisable. Ensure all connections are tight and secure before attempting to start the mower again.
Blown fuses are another common issue. If your mower suddenly stops working, check the fuse box. Locate and inspect the fuses, replacing any that are blown with the correct type and rating specified in your mower’s manual. Always ensure the mower is turned off and the key is removed before handling electrical components to avoid accidental shocks or damage.
8. PTO Problems in the Cub Cadet LTX 1045

The Power Take-Off (PTO) system in the Cub Cadet LTX 1045 is a critical component responsible for transferring power from the engine to the cutting blades, enabling efficient mowing. Understanding the common PTO problems that users can encounter is essential for maintaining smooth operation and extending the lifespan of the lawn tractor.
One prevalent issue is the PTO not engaging. Symptoms include the blades failing to spin when the PTO switch is activated. This problem can often be traced to electrical issues, such as a faulty PTO switch or blown fuse.
Additionally, a worn-out or disconnected PTO clutch wire could be a culprit. User testimonials frequently cite this problem, emphasizing the importance of regular inspection and timely replacement of electrical components.
Intermittent PTO failure is another common concern. This issue is characterized by the PTO functioning sporadically, leading to inconsistent cutting performance. Potential causes include loose or corroded electrical connections that disrupt power flow.
Moreover, a failing PTO clutch can also cause intermittent failure, necessitating a thorough examination of the clutch assembly and wiring harness. Real-world data suggests that intermittent PTO failure is often reported during the peak mowing season, highlighting the need for pre-season maintenance checks.
Unusual noises during PTO activation are also frequently reported. These noises may manifest as grinding, squealing, or rattling sounds. Identifying the root cause involves inspecting the PTO belt for signs of wear or damage. A misaligned or frayed belt can produce unusual noises and should be replaced promptly to avoid further damage.
Additionally, mechanical failures within the PTO clutch or drive pulley can contribute to abnormal sounds, requiring a more detailed mechanical inspection.
Effective Solutions
Addressing PTO problems with your Cub Cadet LTX 1045 can be straightforward with a systematic approach. Begin by adhering to essential safety precautions: ensure the mower is off and the key is removed before starting any checks. Start by verifying the PTO switch.
Engage and disengage the switch to see if it responds correctly. If the PTO switch appears faulty, it may need replacing. Remove the switch from its housing and connect a new one, ensuring all connections are secure.
Next, inspect the wiring. Look for any visible damage, like frayed wires or loose connections. Repair or replace any damaged wiring to prevent electrical failures.
If wiring issues are ruled out, turn your attention to the PTO belts. Worn or misaligned belts can cause the PTO to malfunction.
Check the belts for wear and tear; if they appear worn, replacing them is necessary. To replace a PTO belt, release the belt tensioner, remove the old belt, and install the new one, ensuring it’s properly aligned.
Electrical issues can also affect PTO functionality. Make sure that the battery is fully charged and the terminals are clean and secure. Check the fuses in the circuit; a blown fuse can interrupt the PTO’s operation. Replace any blown fuses and recheck the system.
Regular battery maintenance, such as cleaning the terminals and ensuring a full charge, is crucial for preventing electrical malfunctions
9. Brake Problems in the Cub Cadet LTX 1045
Owners of the Cub Cadet LTX 1045 may encounter several common brake issues, which can significantly impact the mower’s performance and safety. One frequent problem is the brake pedal not fully engaging.
This issue often arises due to worn brake pads, which are essential for creating the friction needed to stop the mower.
Over time, these pads wear down, reducing their effectiveness and causing the brake pedal to feel loose or unresponsive. Regular inspection and timely replacement of brake pads can prevent this problem.
Another common issue is brakes that feel spongy or unresponsive. This can be a result of low brake fluid levels or air trapped in the brake lines. Brake fluid is crucial for the hydraulic braking system to function correctly; insufficient levels can lead to a loss of braking power.
Air in the brake lines disrupts the pressure needed to engage the brakes fully, leading to a spongy feeling when the pedal is pressed. Ensuring that brake fluid is topped up and periodically bleeding the brake lines to remove air can help maintain optimal brake performance.
Unusual noises when applying the brakes are also a common complaint among Cub Cadet LTX 1045 users. These noises, such as squealing or grinding, typically indicate that the brake pads are excessively worn or that there is debris caught between the brake components.
Ignoring these sounds can cause more serious damage and higher repair costs. Regular maintenance, including cleaning and inspecting the brake system, can help identify and resolve these issues early on.
Understanding these common brake problems and their causes is crucial for maintaining your Cub Cadet LTX 1045. Statistics indicate that brake components on mowers generally have an average lifespan of 200-300 hours of use, but this can vary based on operating conditions and maintenance practices. By being aware of these issues and addressing them promptly, you can ensure a safer and more reliable mowing experience.
Effective Solutions
Addressing brake problems in your Cub Cadet LTX 1045 can be straightforward with the right approach. Begin by ensuring the brake fluid is at the correct level. Low brake fluid is a common cause of poor brake performance.
To check, locate the brake fluid reservoir and inspect the fluid level against the marked indicators. If it is low, top off the brake fluid with the manufacturer-recommended type.
Bleeding the brakes is another essential step to remove any air trapped in the brake lines, which can compromise braking efficiency. To bleed the brakes, you’ll need a wrench, a clear tube, and a container to catch the old fluid.
Start by attaching the clear tube to the bleeder valve and submerging the other end in the container. Have an assistant pump the brake pedal while you open the bleeder valve to let air and fluid escape.
Close the valve before the pedal is released to prevent air from re-entering the system. Repeat this process until no air bubbles are visible, ensuring a firm brake pedal.
Inspecting the brake pads for wear and tear is crucial. Worn-out brake pads can significantly reduce braking effectiveness. To check the brake pads, remove the wheel and visually inspect the thickness of the pads.
If they appear thin or unevenly worn, replace them with new pads that meet the specifications for the Cub Cadet LTX 1045. Ensure that the new pads are properly seated and secured to avoid any issues.
Conclusion
By following these guidelines you can easily get rid from the Cub Cadet LTX 1045 problems because here I provide the complete details about it.